Using Tasks - IFS Enterprise Explorer
Explanation
Tasks can be used to remind yourself or your colleagues about different
actions. Tasks may be manually created by Event Actions or created by an external workflow engine. Read more
about Event Actions in the Technical Documentation.
A task can be related to one or several objects in IFS Applications or
generic. If a task is related to one or several objects you can click the link
in the
Task title to navigate to the object(s). The page connected to the
object(s) will open and the object(s) will be displayed.
You can view your tasks in the Task panel in the Context pane or via the
Streams Panel. Tasks are also available via My
Administration/Tasks.
Prerequisites
The Task panel must be visible in the Context pane, read about
Configure
Context Pane.
System Effects
N/A
Window
Task
Panel,
Tasks,
Sent Tasks
Related Window Descriptions
Task Panel
/ Tasks / Sent Tasks
Procedure
You can manage and view your tasks in the Task Panel.
There are three different options to filter the tasks, choose which filtering to use with the radio buttons.
- Related. Displays all tasks related to the IFS Application page
you currently have open. The displayed tasks will change
as you switch between IFS Application pages.
- Most Recent. Displays the 20 most recent tasks sorted by date
received.
- Unread. Display all unread tasks.
Tasks that are unread will display in bold text and tasks that are overdue
will display in red text.
Different symbols are used to clarify the type of task.
 The task is a high
priority task
 The task is a low
priority task
 The task is shared with or reassigned to some other user by you, e.g. other users have the same task in their task list
 The task is connected to one or several objects in IFS Applications. Click
on the link to navigate to the object(s)
 The task is related to a Draft. Read about
Use Drafts.
The task is related to a Draft. Read about
Use Drafts.-
 The
task is created from an Event Action or an external
Workflow engine
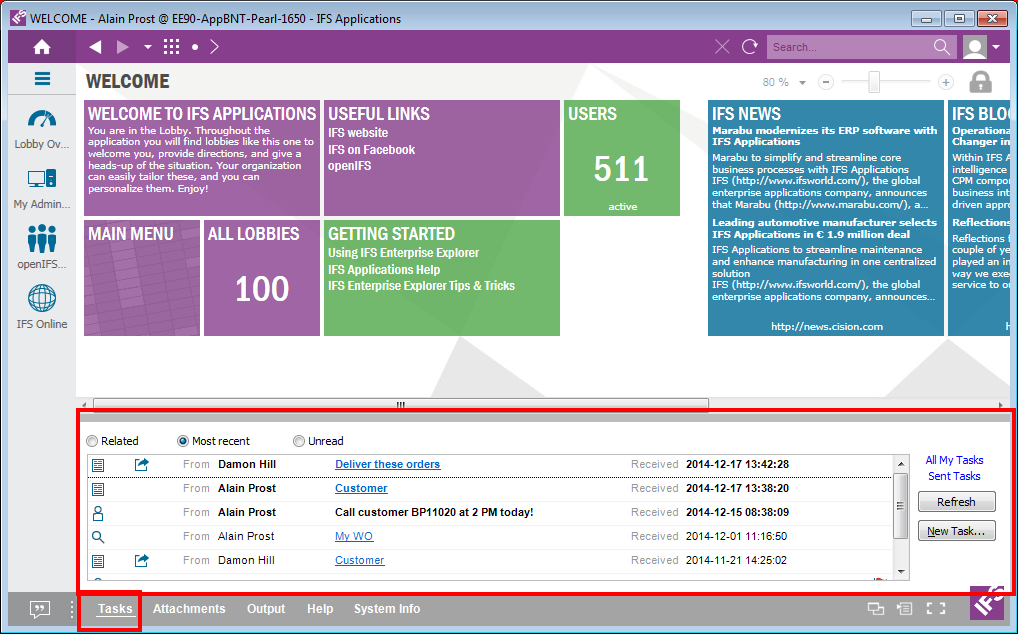
Figure 1: Tasks Panel displaying unread tasks
On the right hand side of the Task Panel the following options are available:
- All My Tasks. Click this link to open the Task page in My
Administration. Read more in
Manage Tasks in My Administration.
- Sent Tasks. This will open the Sent Task page in My
Administration. Read more in Manage
Tasks in My Administration.
- Refresh. Click this button to refresh the information in the Task
Panel, e.g. to display tasks you have received since last time you
opened/refreshed the panel.
- New Task. Click this button to create a new Task for yourself,
e.g. as a reminder of some action. Read more in
Create New Task.
If a task is connected to one or several objects in IFS Applications there is
a link in the title. Click on the link to navigate to the object(s). This action
will mark the Task as "Read".
There are several other actions available in the Task Panel, highlight a Task
and right-mouse click to open the Context menu.
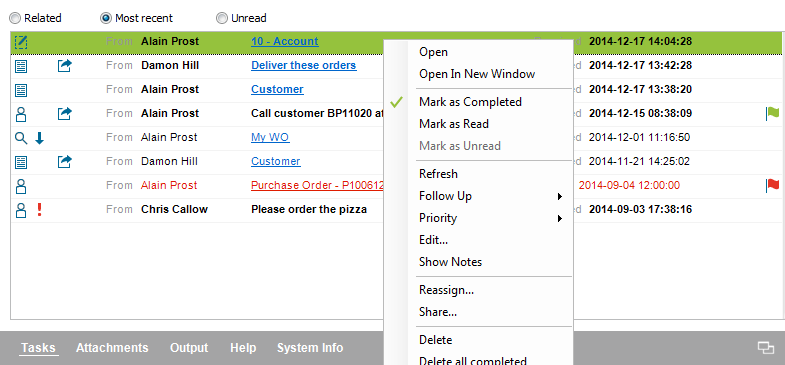
Figure 2. Task Panel Context Menu
The following actions are available:
- Open. This action is available for tasks that are connected to
objects in IFS Applications. It will navigate to the relevant page and
display the connected objects. E.g. the same as clicking on the title link.
- Open in New Window. This action is available for tasks that are
connected to objects in IFS Applications. It will navigate to the relevant
page and open it in a new window and display the connected objects. E.g. the
same as clicking on the title link and holding the Shift key.
- Mark as Completed. Marks the task as completed. A green check mark
will be displayed on the task. If the task is shared with other users all
users will see the green check mark in their tasks lists.
If the task has several response options for completion, e.g. the task is
created by an external workflow engine, these options will be made available
in a submenu. If several
tasks are selected a dialog will pop up for each task that has several response
options. Note that you can set a parameter to automatically delete completed
tasks, read more in Manage Tasks in My Administration.
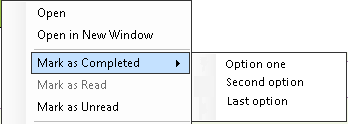
Figure 3. Example Mark as Completed Context Menu
- Mark as Read/Unread. Marks the tasks as read/unread.
- Refresh. Reloads the information in the Task panel, same as using
Refresh button.
-
Follow up:
Use this action to set a follow-up flag on the task. In the sub menu you can
choose from red, yellow,
blue, and green flags. The flag will be displayed on the task. In the
sub menu you have the option to Clear a flag and to Add Reminder.
If you select Add Reminder a dialog will be displayed where you can
set the due date and a flag for the task.
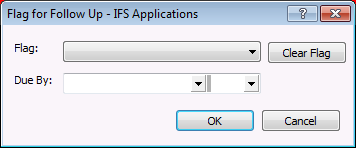
Figure 4. Add Reminder dialog
- Priority: Use this action to set/change the priority of a task.
It opens a sub menu where you can choose between High, Normal and Low. An
icon is displayed on the task based on what you select.
 will be used for High
priority,
  will be used
for Low priority.
- Edit: Opens the Edit Task
dialog where you can view/change the settings of the task. You can
view/change Title, Priority, Follow-up, Due By and Notes. Click OK to
save your changes.
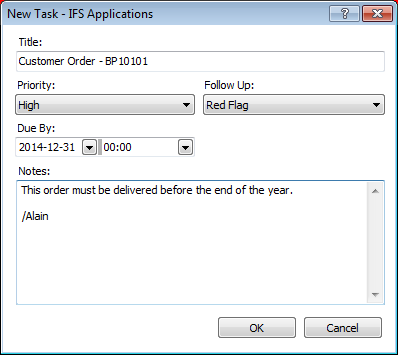
Figure 5. Example Edit Task Dialog
- Show Notes: Expands the task to display the task notes.
- Reassign: This action will reassign the task to another user. It
opens the
Send to Colleague dialog where
specify the name of the user(s) you want to reassign the task to. When a Task is
reassigned it will be removed from your task list. But you can still find it in the Sent Tasks list, marked
with the icon

- Share: This action will share the task with another users. It
opens the
Send to Colleague dialog where
you specify the name of the user(s) you want to share the task with.
When a task is shared it will still remain in your task list, marked
with the icon

- Delete. This action will remove the highlighted tasks.
- Delete Completed. This action will remove all tasks that
you have set to Completed.
Tasks are normally send from other users/Event Actions/external
workflow engines but it can also be useful to create your own tasks as
reminders of different actions. Follow these steps to create a task:
- Click the New Task button in the Task Panel to create a new task
for yourself. You will be asked if you want the task to be connected to the
page you currently have open in the work area or not. If the task is related
to the page the Title will include a link to the page and the objects you
have highlighted in the page. The New task dialog is displayed,
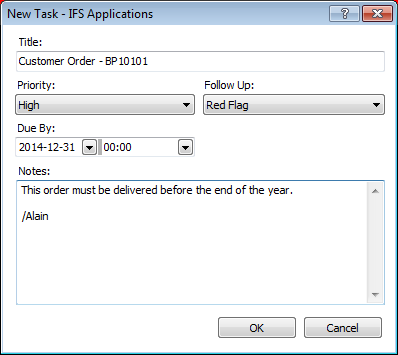
Figure 6: New Task dialog box
- If the task is connected to a page the page title will be suggested but
you can change this. Define Priority, Follow-up, Due By
and Notes. Click OK to save the task.
You will be notified if you have new tasks or other notifications such as
subscriptions etc. via the Stream icon below the Short cut panel.
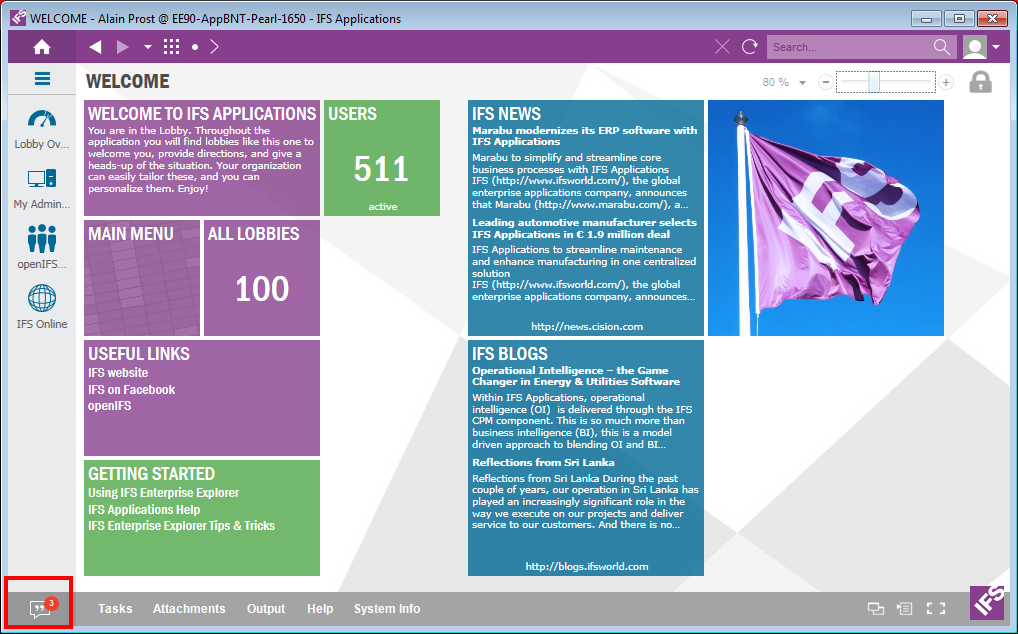
Figure 7: The Streams icon indicates there are new notifications.
Open up the Streams Panel by clicking on the Streams icon. All types of
notifications will be displayed. Tasks are marked with the color purple. Click
on the title of the task to open the Task administration page where you can act
on your tasks, see section Tasks
in My Administration.
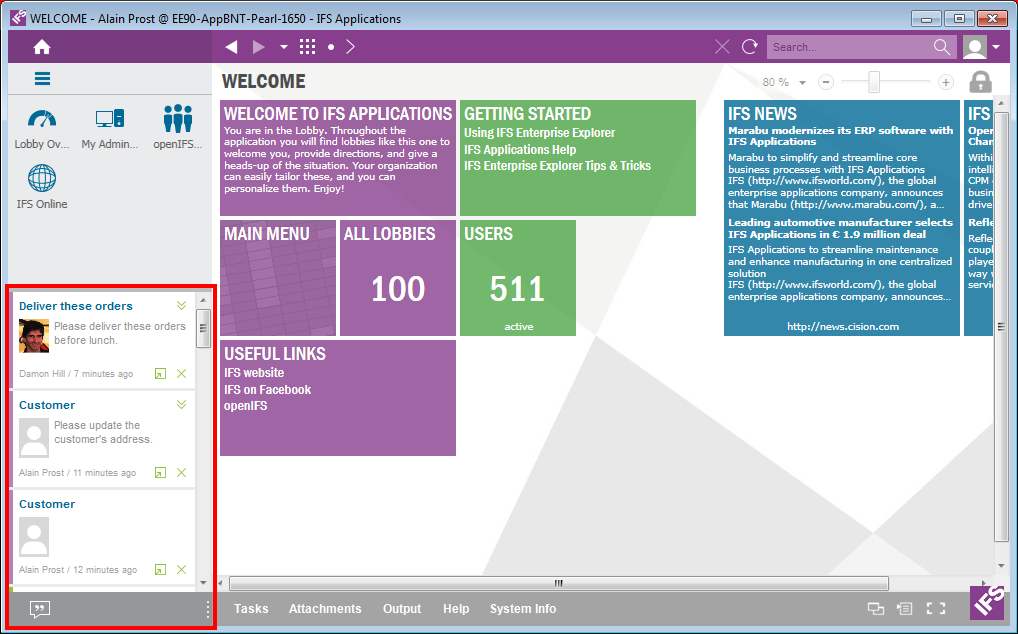
Figure 8: Streams Panel is open
You can manage your tasks via My Administration and the pages Tasks and
Sent Tasks.
The Tasks page shows all your tasks.
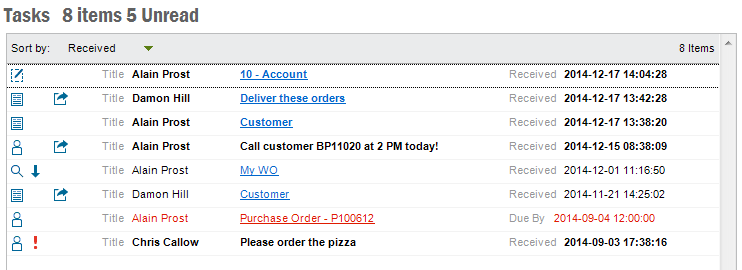
Figure 9. Tasks in My Administration
You manage the tasks like you manage tasks in the task panel, read about
Tasks in Task panel. Right-mouse click
to open the context menu where all actions are available.
There is one additional option in the Tasks page. In the context menu there is a
Settings option where you can define how to handle completed tasks, the
setting is also affecting the Task panel. There
are two options:
- Delete completed tasks. This will delete all the completed tasks
each time you refresh the page. Note that if a task is shared with other
users it will be deleted from your list if you or the other user(s) have completed it.
- Delete tasks when I complete it. This will automatically delete
all tasks from your list when you complete them. If other users complete
tasks that are shared by you they will still be visible in your task list
but marked as completed
The Sent Tasks page shows all your sent tasks.

Figure 10. Sent Tasks page with context menu.
You manage the tasks like you manage tasks in the task panel, read about
Tasks in Task panel, but there is one
additional options in this page.
There is one additional option in the Tasks page. In the context menu there is a
Settings option where you can define how to handle completed tasks, the
setting is also affecting the Task panel. There
are two options:
- Delete completed tasks. This will delete all the completed tasks
each time you refresh the page. Note that if a task is shared with other
users it will be deleted from your list if you or the other user(s) have completed it.
- Delete tasks when I complete it. This will automatically delete
all tasks from your list when you complete them. If other users complete
tasks that are shared by you they will still be visible in your task list
but marked as completed
 The task is a high
priority task
 The task is a low
priority task
 The task is shared with or reassigned to some other user by you, e.g. other users have the same task in their task list
 The task is connected to one or several objects in IFS Applications. Click
on the link to navigate to the object(s)
 The task is related to a Draft. Read about
Use Drafts.
 The
task is created from an Event Action or an external
Workflow engine


