Order reports via the navigator node Reporting/Operational Reports/Order Report or Reporting/Operational Reports/Reports. Once you have selected a report specify report parameters and how you want to distribute the report. Completed reports are placed in the Report Archive where they are stored until they expire. If you want to print a report a second time, you do not have to re-order it, search for it in the Report Archive and print it from there. It is also possible to schedule report printing to be executed more than once or at a specified date time etc. Read more about Scheduled Reports.
Note that many reports can also be printed directly from IFS Application pages. For instance, an invoice page might have an operation to create and print the invoice. This direct printing is a quicker, more convenient way to print reports when it's available.
You will only be able to print reports your have the authority to print.
Completed reports are stored in the Report Archive.
N/A
Report Archive, Scheduled Reports
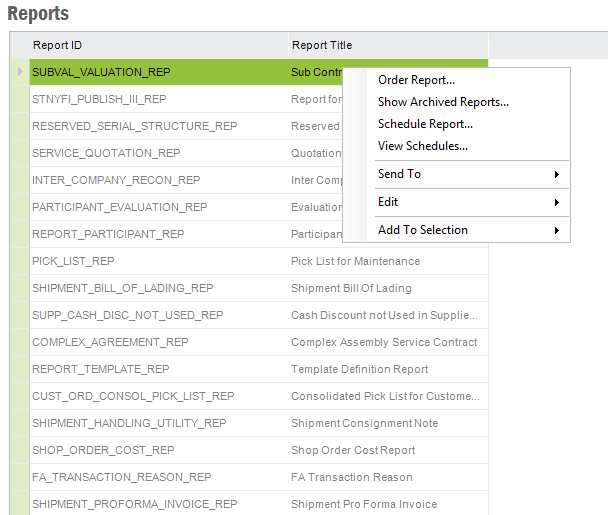
You can order reports from different places in the navigator
Figure 1: Reports context menu
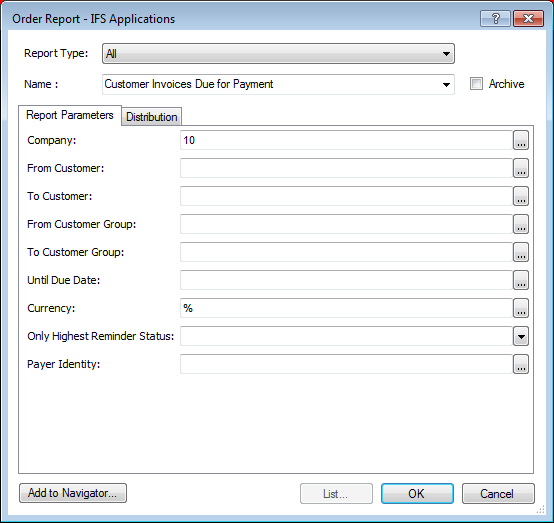
Figure 2: Order Report dialog box
At the top of of the dialog is a drop-down list. If you have already selected which report to print it will display the report title. If you have opened the dialog directly from the Navigator you can select report in the drop-down.
The check box Archive is used if you want to create the report in the Report Archive without printing it. The report will be placed directly in the Report Archive without showing the Print dialog.
The Order Report dialog contains two tabs.
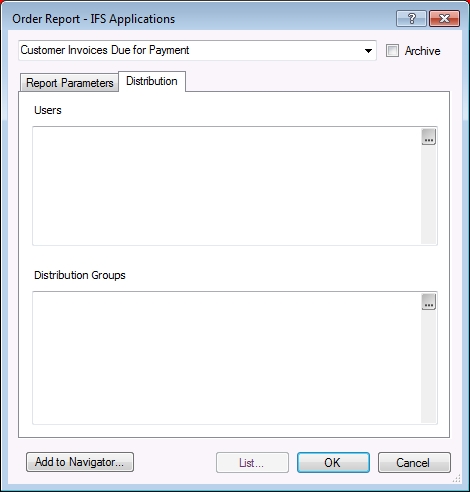
Figure 3. Distribution tab
Once the required report parameters are specified you can use the Add to Navigator button to create a navigator node for the report including the parameters. The Add to Navigator dialog is displayed where you enter the name to use in the navigator. Click OK to create the node and it will be placed in the folder where you opened the Order Report dialog.
When report parameters and distribution information is defined click OK button and the Print Report dialog will be displayed.
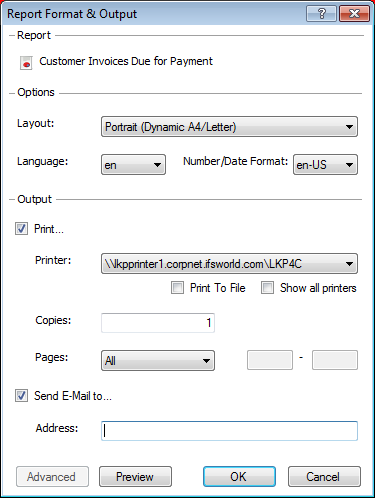
Figure 4. Print Report Dialog
In the Print Report dialog you can control the following:
Click OK button to start the printout.